The Bird of Paradise is renowned for its unique, vibrant blooms and elegant foliage, making it a sought-after addition to many gardens and homes.
However, like all plants, there comes a time when it outgrows its current space or needs a change for better growth conditions.
That’s why it becomes important to learn how to transplant a Bird of Paradise without affecting it in any manner.
In fact, transplanting can become essential for the plant’s health and overall vitality.
If you’ve observed your Bird of Paradise looking less than its best or are simply preparing for its growth, you might be considering a transplant.
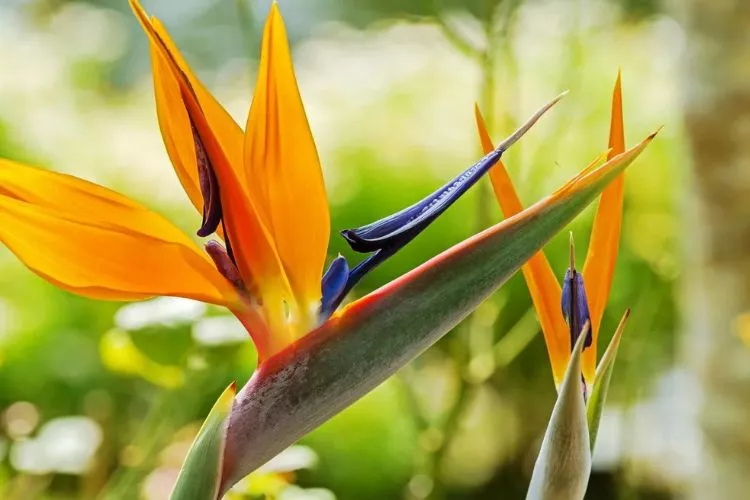
This process can be filled with questions and potential pitfalls. This article aims to address these concerns, guiding you through a successful transplanting journey.
Let’s give your plant the best chance at renewed vigor and growth.
Table of Contents
Know Your Bird of Paradise
Before diving into the transplanting process, it’s crucial to identify which type of Bird of Paradise you’re dealing with, as each has its unique characteristics and requirements.
- Strelitzia reginae: Often referred to as the ‘Orange Bird of Paradise’, this variant is the most common. It boasts bright orange and blue flowers, closely resembling the vibrant birds from which it derives its name. Typically, it grows to a height of 3-4 feet (0.9-1.2 meters) in containers but can reach up to 6 feet (1.8 meters) when planted in the ground. It prefers full sun but can tolerate some shade.
- Strelitzia nicolai: Known as the ‘Giant Bird of Paradise’, this species stands out due to its sheer size, often reaching up to 20 feet (6 meters) or more in height. Its flowers are more subdued in color, presenting in shades of white and blue. While it can adapt to various lighting conditions, it thrives best in full sunlight.
When it comes to growth habits, both species are evergreen perennials. They prefer well-draining soil and are relatively drought-resistant once established.
However, during their growth phase, consistent watering is key.
Temperature-wise, neither type tolerates frost well, so if you’re in a cooler region, it’s essential to shield them during colder months or consider indoor planting.
Understanding these basics about your Bird of Paradise will go a long way in ensuring a successful transplant and future care.
Signs that your bird of paradise needs to be transplanted
Your Bird of Paradise, like any other plant, communicates its needs through various subtle cues. If you notice any deviations from its usual vibrancy, it might be indicating its desire for a change.
Let’s delve into the tell-tale signs that suggest your plant is yearning for a transplant.
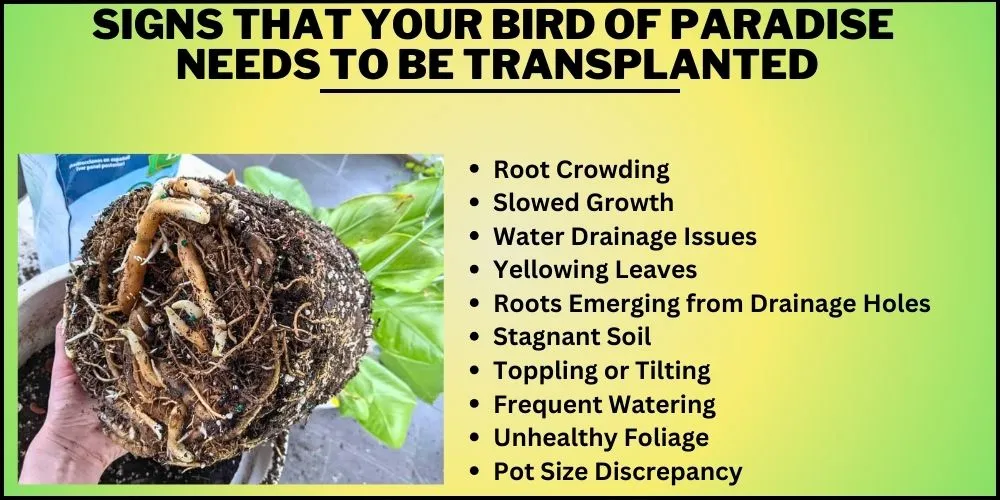
Root Crowding
One of the most common indications that your Bird of Paradise is outgrowing its current home is root crowding.
If you notice roots pushing through the soil surface or even protruding from the pot’s drainage holes, it’s a clear sign that the plant’s root system is becoming too large for its container.
A cramped root environment can stress the plant, limiting its access to essential nutrients and water.
Slowed Growth
Every plant owner eagerly anticipates the growth of their beloved green companions. However, if you observe that your Bird of Paradise’s growth has significantly slowed down or come to a halt, despite receiving adequate care, it might be due to restricted roots.
A pot that’s too small can confine the roots, preventing them from spreading out and absorbing the nutrients they need for growth. Transplanting to a larger space can often kickstart its growth spurt.
Water Drainage Issues
Proper water drainage is essential for the health of most plants, and the Bird of Paradise is no exception. If water remains pooled on the soil’s surface for prolonged periods or if the pot becomes waterlogged, it indicates poor drainage.
This could be due to the soil compacting over time or because the roots have become so dense that they’re blocking the drainage holes. Poor drainage can lead to root rot, a detrimental condition for your plant.
In such cases, it’s a good idea to consider transplanting and ensuring the plant has fresh, well-draining soil in its new home.
Yellowing Leaves
One of the first and most noticeable signs that your Bird of Paradise may need a change is the yellowing of its leaves.
While occasional yellow leaves can be a natural part of the plant’s life cycle, if you observe a sudden increase or if multiple leaves turn yellow at once, it could be a cause for concern.
This yellowing can be attributed to various factors, including a lack of nutrients from overcrowded roots, poor water drainage, or even stress from being in a confined space for too long.
Roots Emerging from Drainage Holes
If you spot roots peeking out from the drainage holes of your pot, it’s a glaring sign that your Bird of Paradise has outgrown its current abode.
This phenomenon indicates that the roots are searching for more space to grow and are not finding it within their current confines.
Besides restricting nutrient absorption, these protruding roots can become damaged or entangled, which can affect the overall health and stability of your plant.
Stagnant Soil
Stagnant or compacted soil can lead to multiple issues for your Bird of Paradise. When the soil becomes densely packed or loses its porous nature, it hinders the roots’ ability to breathe and absorb essential nutrients.
Over time, this can lead to a weakened plant more susceptible to diseases and pests.
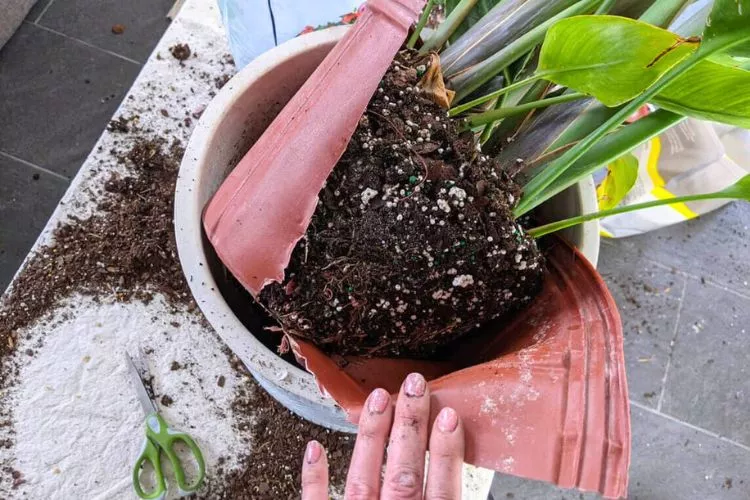
If you touch the soil and it feels hard or if water tends to sit on top without seeping through, it’s an indication that the soil has become stagnant and a transplant with fresh, aerated soil may be in order.
Toppling or Tilting
A healthy Bird of Paradise stands tall and proud. If you notice your plant starting to topple over or tilt to one side, it could be a sign of an imbalanced root-to-plant ratio.
This toppling is often due to the plant becoming too top-heavy for its pot, or its roots not having enough room to anchor the plant securely.
A larger container can provide a sturdier base, ensuring your Bird of Paradise remains upright and avoids any potential damage from falling.
Frequent Watering
Under normal conditions, the Bird of Paradise doesn’t require daily watering.
However, if you find yourself needing to water your plant more often than usual, it might be an indication that the root system has grown so dense that it’s rapidly absorbing the available moisture.
This frequent thirst can be a sign that the roots are running out of room and are competing for every drop they can get.
Transplanting into a larger container with fresh soil can offer the roots more space and moisture, leading to a more balanced watering schedule.
Unhealthy Foliage
A flourishing Bird of Paradise showcases vibrant, green, luscious leaves. However, if you start seeing leaves that appear lackluster, droopy, or even develop brown spots, it might signal underlying issues.
While these symptoms can be caused by various factors, one potential reason is the restricted root growth in a limited space, leading to insufficient nutrient absorption.
In such cases, the plant may benefit from being transplanted into a more spacious environment where its roots can spread out and provide it with the nourishment it needs.
Pot Size Discrepancy
A general rule of thumb for most plants, including the Bird of Paradise, is that the pot’s size should be in proportion to the plant.
If your plant appears to dwarf its container or if the pot seems to bulge due to the roots pressing against its sides, it’s a clear indication of a pot size discrepancy.
This mismatch not only aesthetically looks unbalanced but also impacts the plant’s health by hindering its growth potential.
Opting for a pot that gives your Bird of Paradise enough room to grow will not only enhance its visual appeal but also contribute to its overall health and vitality.
How to Transplant a Bird of Paradise? (A Step-By-Step Guide)
Transplanting your Bird of Paradise may seem daunting, especially given its unique structure and growth needs. However, with the right approach and a touch of care, the process can be smooth and rewarding.
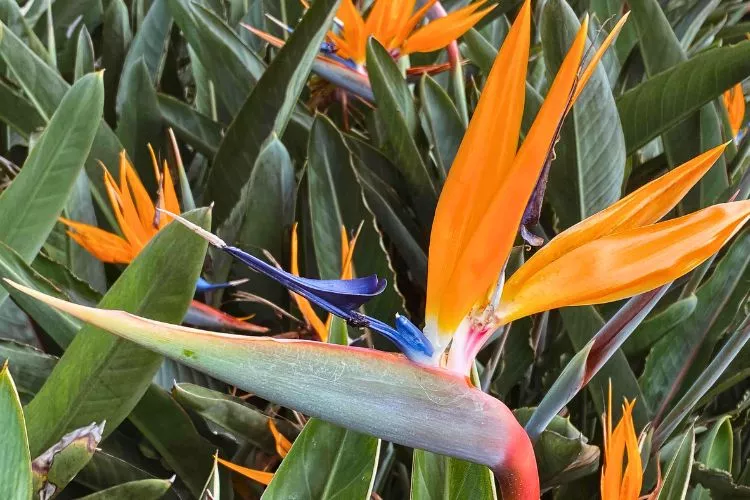
In this comprehensive guide, we’ll break down each step to ensure your beloved plant transitions seamlessly to its new home, continuing to flourish and brighten your space. Let’s dive in and set the stage for a successful transplant.
Choosing the Right Time
When it comes to transplanting your Bird of Paradise, timing is crucial. The ideal period for this task is during the early spring, just as the plant is gearing up for a new season of growth.
At this time, the temperatures begin to rise, and the daylight hours extend, offering optimal conditions for the plant to settle into its new home.
However, it’s essential to be mindful of local climate variations. If you live in an area with mild winters, late winter could also work, but always ensure there’s no risk of frost.
Conversely, in tropical regions where the Bird of Paradise thrives year-round, transplanting can be more flexible, but it’s still preferable to do it during the cooler months to reduce stress on the plant.
Additionally, consider the current weather conditions. Choose a day that’s overcast or with moderate temperatures, avoiding extreme heat or cold. This way, you can ensure a smoother transition for the plant, minimizing potential transplant shock.
Remember, like any other significant change, your plant will need some time to adjust, and giving it the best starting conditions will make a world of difference.
Gather Essential Tools and Materials
Transplanting your Bird of Paradise requires more than just a new pot. It’s akin to moving house; you want everything to be ready and in place for the smoothest transition possible.
Here’s a checklist of the essential tools and materials you’ll need:
- A Suitable Pot: Ideally, choose one that’s 2 to 4 inches (5 to 10 cm) larger in diameter than the current one. Ensure it has adequate drainage holes to prevent waterlogging.
- High-Quality Soil Mix: The health of your Bird of Paradise largely depends on the soil it calls home. A well-draining potting mix, preferably one designed for tropical plants, is a must. This ensures the roots get the aeration they need while retaining enough moisture for nourishment.
- Trowel or Garden Spade: These will aid in removing the plant from its current pot and also help in filling the new pot with soil.
- Gloves: Protecting your hands while working can prevent potential skin irritations, especially if you’re sensitive to soil or plant saps.
- Pruning Shears: To trim away any damaged or overly long roots and for light pruning of the foliage if needed.
- Watering Can: For giving your plant a good soak post-transplant.
- Mulch or Compost (Optional): For an added nutrient boost, you can mix in some organic compost or mulch with your potting mix.
Using high-quality soil is not just about ensuring healthy growth. It’s an investment in the longevity and vitality of your Bird of Paradise.
A nutrient-rich, well-aerated soil will support the plant’s roots, allowing them to spread, breathe, and absorb the essential nutrients they need. Think of it as laying a strong foundation for your plant’s future growth and well-being.
Selecting the New Location
Finding the right location for your transplanted Bird of Paradise is akin to choosing a prime piece of real estate for your home. It needs the perfect blend of sunlight, space, and favorable conditions to truly flourish.
- Sunlight Requirements: Bird of Paradise plants adore sunlight. Ideally, they need a spot that receives bright, indirect light for several hours a day. While they can tolerate direct sunlight, prolonged exposure, especially during the peak hours, can lead to sunburned leaves. So, if you’re placing it near a south-facing window, consider using sheer curtains to filter the sunlight.
- Space Considerations: These plants can grow quite tall, especially the Strelitzia Nicolai variety. Ensure you provide ample overhead space so the foliage can spread without obstruction. Additionally, keep in mind that the larger the pot, the more room the roots will have to spread, leading to a taller plant over time.
- Soil Type and Drainage: Even if you’re planting your Bird of Paradise in the ground instead of a pot, soil drainage remains paramount. The ground should be well-draining to prevent root rot. If your garden soil is too compact or clayey, consider amending it with sand or a well-draining potting mix to improve its texture.
- Proximity to Other Plants: While the Bird of Paradise is a fairly sociable plant, it’s a good idea to give it some space away from other large plants. This ensures its roots have enough room to spread and that its large leaves won’t overshadow neighboring plants.
In essence, think of your Bird of Paradise’s new location as its permanent residence. The more thought and care you invest in selecting the perfect spot, the more you’ll be rewarded with a vibrant, thriving plant that becomes a true focal point in your space.
Preparing the Bird of Paradise
Before diving into the transplanting process, it’s essential to get your Bird of Paradise ready for its big move. Just like you’d pack and prep before relocating, your plant requires similar attention. Here’s a systematic approach to ensure your plant is primed for transplanting:
- Watering First: A day before transplanting, water your plant thoroughly. This ensures the roots are hydrated, making them more pliable and less likely to break during the move.
- Inspect the Plant: Take a moment to visually inspect your Bird of Paradise. Look out for any signs of diseases or pest infestations. Addressing these issues before transplanting can prevent them from escalating in the new environment.
- Pruning Damaged Foliage: Using clean pruning shears, remove any yellowed, brown, or damaged leaves. Not only does this improve the plant’s appearance, but it also directs energy towards healthier growth.
- Root Check: Gently remove the plant from its pot, if possible, to inspect the roots. Healthy roots should be firm and whitish. Trim away any overly long or damaged roots, ensuring the root ball remains intact.
- Loosening the Roots: If the plant is root-bound, meaning the roots are densely packed and circling the base, gently tease them apart. This encourages them to spread out once transplanted, ensuring better growth.
- Pruning Tips: When it comes to pruning your Bird of Paradise, less is more. While it’s essential to remove damaged or diseased parts, avoid over-pruning. The goal is to reduce stress on the plant, not create more. Always make clean cuts and avoid tearing the foliage.
In essence, the preparation stage is all about ensuring your Bird of Paradise is in the best possible shape for transplanting. By giving it a little TLC now, you’re setting the stage for a smoother transition and a healthier plant in the long run.
Transplanting Procedure
The moment has come. With your Bird of Paradise prepped and the new location picked out, it’s time to undertake the transplant. This procedure, while straightforward, requires a gentle touch and some patience. Here’s a step-by-step guide to ensure your plant’s move goes off without a hitch:
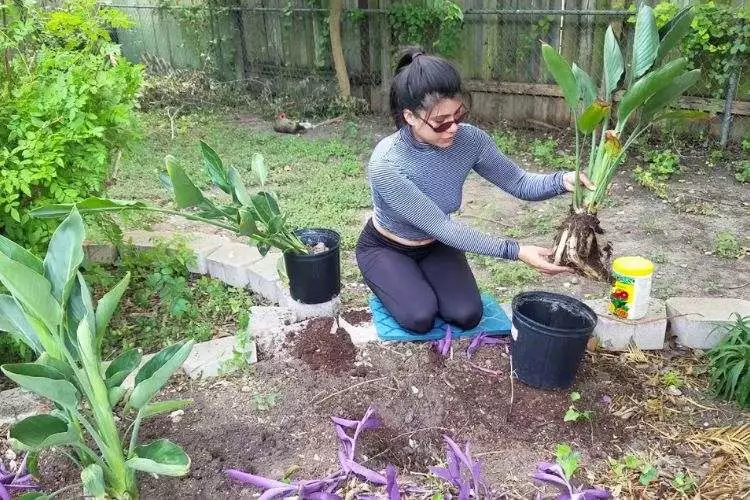
Safely Removing from Current Location
- Begin by watering the plant’s soil lightly to reduce stress and make removal easier.
- If it’s in a pot, tip it to the side gently and tap the bottom to loosen the root ball. For ground-planted Birds of Paradise, dig around the plant, keeping a safe distance to avoid damaging the primary roots.
- Using your fingers or a soft tool, gently remove the plant from its current spot. Ensure you support the base and the root ball to prevent breakage.
Preparing the New Hole
- For a pot: Ensure your pot has adequate drainage holes. Add a layer of broken pottery or coarse gravel at the base to facilitate drainage. Fill the pot with the soil mix until it’s about a third full.
- For ground planting: Dig a hole twice as wide as the root ball and about the same depth. This ensures the roots have ample room to spread out.
Positioning the Plant
Carefully place your Bird of Paradise into the center of the hole or pot. The top of the root ball should be level with the soil line. This ensures that the plant isn’t sitting too deep or too high in its new home.
Filling in
- Gently backfill with the soil mix, ensuring there are no air pockets. As you fill, periodically tap the sides of the pot or pat down the ground soil to remove any gaps.
- Remember to leave a slight depression around the base of the plant to help retain water.
Watering
- Once planted, water the Bird of Paradise thoroughly. This will help settle the soil and provide the roots with immediate hydration.
- For the next few days, monitor the soil moisture closely and water as needed. The goal is to keep the soil consistently moist but not soggy.
Observation
- For the first few weeks after transplanting, keep a close eye on your plant. It’s normal for some leaves to yellow or droop slightly due to transplant shock. However, with proper care, it should bounce back in no time.
Remember, while the process might sound meticulous, your Bird of Paradise is resilient. With some care, attention, and a little patience, it’ll soon adjust and thrive in its new location, rewarding you with its spectacular blooms and vibrant foliage.
Watering and Care After Transplanting
Transplanting, though beneficial in the long run, can be a stressful event for any plant, including the Bird of Paradise. Ensuring its immediate and ongoing care will be the key to a successful transplant.
Here’s what you need to know:
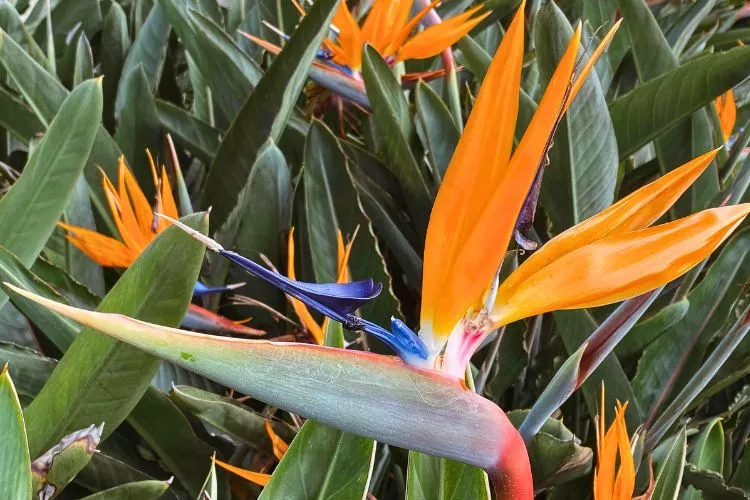
- Immediate Watering: Watering immediately after transplanting is paramount. The process can disturb the delicate roots, potentially causing them to dry out or become damaged. A generous dose of water helps settle the soil around these roots, eliminating air pockets and ensuring they make good contact with the soil. This immediate hydration acts as a healing balm, aiding recovery and establishing the plant in its new home.
- Consistent Moisture, Not Sogginess: For the subsequent weeks, it’s essential to maintain a balance. While the soil should remain consistently moist to support the recovering plant, overwatering can lead to root rot. Check the soil regularly, aiming to water when the top inch feels dry to the touch.
- Ongoing Care:
- Fertilization: About a month after transplanting, once your Bird of Paradise has settled in, consider introducing a slow-release fertilizer to support its growth. This will provide essential nutrients, promoting vibrant foliage and those iconic blooms.
- Maintenance: Regularly check for damaged or yellowing leaves and prune them to maintain the plant’s health. This not only keeps your plant looking its best but also ensures it directs energy to new growth.
In essence, post-transplant care revolves around understanding the plant’s needs and responding accordingly. A well-watered and cared-for Bird of Paradise will rebound from the transplant stress faster and reward you with lush, tropical beauty.
Potential Challenges and Solutions
Transplanting a Bird of Paradise, while often necessary for its well-being, isn’t without its set of challenges. Fortunately, with some insight, many of these can be preempted or resolved.
Let’s delve into the common problems and their corresponding solutions.
1. Transplant Shock
- Problem: The most prevalent challenge is transplant shock, manifesting as wilting, yellowing, or drooping leaves shortly after the move.
- Solution: Ensure immediate post-transplant care, including proper watering and protection from harsh sunlight. Most plants will naturally recover from this initial shock with proper care. Patience is key.
2. Root Rot
- Problem: Overwatering, especially in pots without adequate drainage, can lead to root rot—a fungal disease that attacks the roots.
- Solution: Ensure the pot or planting site has proper drainage. If you suspect root rot, remove the plant, trim away the damaged roots, and repot in fresh, well-draining soil.
3. Sunburn
- Problem: If a Bird of Paradise, previously in a shaded spot, is suddenly exposed to direct sunlight post-transplant, its leaves might show signs of sunburn—brown or bleached spots.
- Solution: Gradually acclimate the plant to increased light exposure. If it’s in a pot, consider moving it to a shaded spot for a few days post-transplant.
4. Pest Infestations
- Problem: Stressed plants are magnets for pests like aphids, mealybugs, or spider mites.
- Solution: Regularly inspect the leaves and stem for pests. If detected early, a gentle spray of water can dislodge them. For persistent infestations, consider using insecticidal soap.
5. Lack of Growth
- Problem: Even after the initial shock has passed, the plant may not show signs of new growth.
- Solution: Ensure it’s receiving the right amount of sunlight and water. After a few months, consider introducing a balanced fertilizer to boost growth.
6. Soil Issues
- Problem: Unsuitable or compacted soil can impede root growth and water absorption.
- Solution: Ensure you’re using a high-quality soil mix designed for tropical plants. If in the ground, consider aerating the soil around the plant to improve water penetration.
Remember, challenges in plant care are often par for the course. But with keen observation, timely action, and a dash of persistence, your Bird of Paradise will sail through them, emerging stronger and more beautiful.
Pro Tips for Successful Transplantation
Embarking on the journey of transplanting a Bird of Paradise can seem daunting, but armed with some professional insights, the process can be considerably smoother.
After decades of nurturing these tropical beauties, here are some expert tips to ensure your plant doesn’t just survive the transplant but thrives:
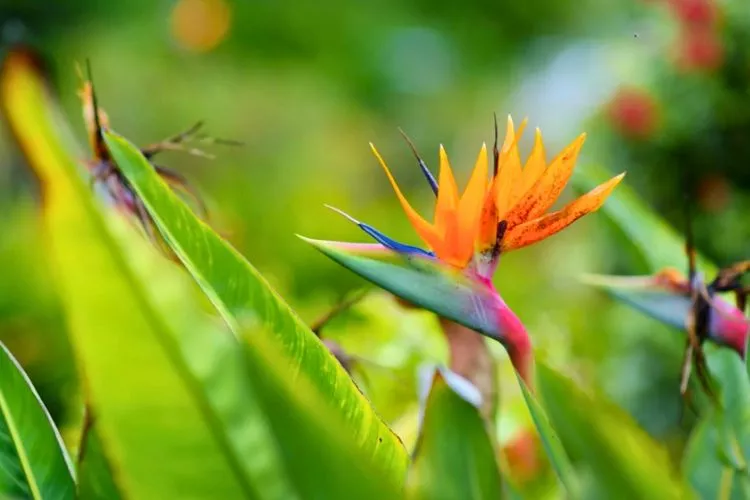
- 1. Understand Its Native Habitat: The Bird of Paradise is native to South Africa, a region with warm temperatures and well-draining soil. Replicating these conditions can offer your plant the comfort of home. It’s all about mirroring nature!
- 2. Size Matters, But Not How You Think: Choose a pot or planting location only slightly larger than the root ball. Oversized containers can cause the soil to stay damp for too long, increasing the risk of root rot.
- 3. Soil Aeration is Key: Before placing your plant into its new home, fluff up the soil a bit. This ensures good air circulation around the roots, promoting healthier growth.
- 4. Water Quality: Birds of Paradise can be sensitive to chemicals often found in tap water. If possible, use filtered or rainwater for the initial watering post-transplant and subsequently.
- 5. Hold Off on Fertilizing: While it might be tempting to give your newly transplanted plant a nutrient boost, hold off for at least a month. Let the plant recover and adjust to its new environment first.
- 6. Physical Support: Especially for taller Birds of Paradise, consider using stakes to provide physical support post-transplant. This can prevent them from toppling over while the roots are yet to firmly anchor themselves.
- 7. Monitor Closely, But Don’t Over-Baby: While it’s crucial to keep an eye on your plant after transplanting, resist the urge to constantly poke around or change things. Plants have an innate ability to adjust, and sometimes, the best thing we can do is to let them be.
- 8. Embrace Patience: It’s the unsung hero of the gardening world. Transplanted plants may not immediately burst forth with new growth or flowers. This doesn’t mean they’re failing; they’re just taking their time to adjust. So, brew a cup of tea, pull up a chair, and watch the slow, beautiful process of nature unfold.
Transplanting, like all plant care, is as much art as it is science. While guidelines help, your intuition, observations, and most importantly, patience play a crucial role.
Remember, every little effort you invest today sets the stage for a magnificent display of those iconic crane-like flowers in the future. And trust me, it’s well worth the wait!
Frequently Asked Questions (fAQs)
Can I transplant a mature Bird of Paradise?
Yes, mature Birds of Paradise can be transplanted. However, it requires extra care to avoid damaging the larger root system and ensuring successful acclimation.
Is it necessary to trim the leaves before transplanting?
Trimming isn’t mandatory, but removing damaged or yellowing leaves can reduce stress on the plant and direct energy to root establishment.
How often should I water my Bird of Paradise after transplanting?
Water immediately after transplanting, then monitor soil moisture. Water when the top 2 inches (5 cm) feel dry, ensuring good drainage to prevent root rot.
Can Bird of Paradise be transplanted into pots?
Absolutely! Just ensure the pot is slightly larger than its root ball and has adequate drainage holes.
How do I protect my Bird of Paradise from pests and diseases post-transplantation?
Maintain good hygiene, remove dead foliage, ensure proper spacing for airflow, and periodically inspect for pests. If detected, treat with insecticidal soap or neem oil.
Conclusion
Successfully transplanting a Bird of Paradise involves several key steps: knowing your plant type, recognizing when it’s time to transplant, choosing the right time and tools, and ensuring proper aftercare.
Patience, attention to detail, and proactive care are vital.
By following this guide, you position your plant for robust growth and health. We hope that this guide has been helpful. You can read about similar topics here on our website.
Check back again soon for more.


