Owning a lawn mower is essential to home upkeep, but what happens when a wheel malfunctions or requires maintenance?
You’ll need to know how to remove lawn mower wheel retaining clip, a seemingly small but crucial component that holds the wheel securely in place.
Understanding this removal process saves you time and money you’d otherwise spend on a professional service call.
If you’ve ever struggled with a wobbly wheel, had to replace a tire, or even contemplated a full mower upgrade because of minor wheel issues, this article is your go-to guide.
We’ll walk you through a detailed, step-by-step process, addressing common challenges and offering expert tips to make the task as smooth as possible.
Equip yourself with this knowledge and turn what could be a daunting repair job into a simple, stress-free task.
Table of Contents
How Does Lawn Mower Wheel Retaining Clip Works?
If you’re new to lawn mower maintenance, you may wonder what exactly a wheel retaining clip is and why it’s vital.
In essence, a retaining clip, sometimes referred to as a ‘cotter pin’ or ‘retaining pin,’ is a fastener that holds the wheel onto the axle of the lawn mower.
It’s designed to bear the load and mechanical vibrations of the mower’s operation, keeping the wheel securely in place as you mow your lawn.
Think of the retaining clip as the unsung hero of your lawn mower’s wheel assembly. While it may seem insignificant in size, its role is anything but trivial.
Without it, your lawn mower’s wheels would be prone to wobbling, coming loose, or even falling off during operation, turning a simple lawn-mowing task into a risky venture.
In addition, the retaining clip is often made of sturdy materials like stainless steel or zinc-plated steel, which ensures durability and minimizes the chances of rust and wear.
Understanding the role of the retaining clip in your lawn mower is key to efficient and safe operation.
Knowing how it works not only demystifies the anatomy of your lawn mower but also prepares you for tasks like wheel replacement, maintenance, or even upgrading to a more robust wheel assembly.
With this foundational knowledge, you’re better equipped to understand the subsequent steps of removing and replacing the clip.
How to Remove Lawn Mower Wheel Retaining Clips (A Step-BY-Step Process)
Now that you understand the pivotal role of the wheel retaining clip in your lawn mower, it’s time to delve into the step-by-step process of how to remove lawn mower wheel retaining clips.
Whether tackling routine maintenance or facing an unexpected repair, knowing how to remove this small but crucial component is invaluable.
Gather Necessary Tools and Implement Safety Precautions
Before you roll up your sleeves and get down to the nitty-gritty of removing the wheel retaining clip, assembling the right set of tools is crucial. Fumbling for the correct tool mid-process is frustrating and can pose safety risks.
Essential Tools
- Pliers: A pair of needle-nose pliers best grip the small retaining clip securely.
- Flathead Screwdriver: Useful for prying the clip open if it’s a bit tight or rusted.
- Wrench: An adjustable wrench may be needed for loosening any nuts that secure the wheel to the axle.
- Jack or Wooden Blocks: For elevating the lawn mower to access the wheel assembly easily.
Safety Gear
Just as vital as the correct tools are appropriate safety precautions. Never underestimate the value of safety, especially when working with mechanical components.
- Gloves: Protects your hands from cuts and abrasions.
- Eye Protection: Safety glasses are a must to shield your eyes from flying debris or accidental splashes of lubricant.
- Closed-Toe Shoes: Always wear sturdy shoes to protect your feet from heavy components that might fall.
Preparation Steps
Before removing the wheel retaining clip, it’s essential to establish a safe and effective working environment. Here’s how to get started:
Safety First
Your safety should be your top priority. Always start by shutting off the lawn mower completely. For an added layer of safety, disconnect the spark plug.
This simple step ensures that the mower cannot accidentally start while you’re working on it, significantly reducing the risk of injury.
Elevating the Mower
With the mower powered off and the spark plug disconnected, your next step is to elevate the machine to access the wheel assembly comfortably. You can tip it on its side if you’re working on a push mower.
However, use a mechanical jack or sturdy wooden blocks for larger riding mowers to lift it. Ensure the mower is stable before proceeding to prevent any unexpected movements.
Wheel Removal
At this stage, you’re ready to remove the wheel from the axle shaft, setting the stage for the retaining clip’s removal.
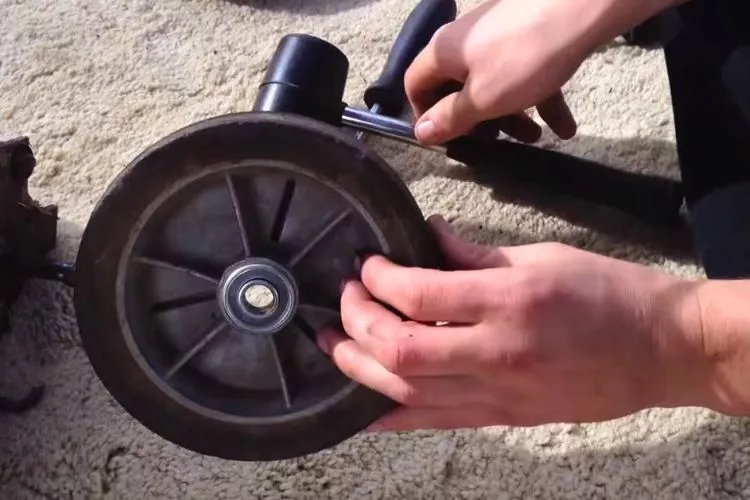
Use an adjustable wrench to loosen and remove the nut if your mower’s wheel is bolted onto the axle. Once the nut is off, gently pull the wheel away from the axle shaft.
Identifying the Retaining Clip
Locating the retaining clip is a critical step; doing it right could save you much time and frustration. While it’s tempting to think that all retaining clips look the same, they can differ significantly depending on the brand and model of your lawn mower.
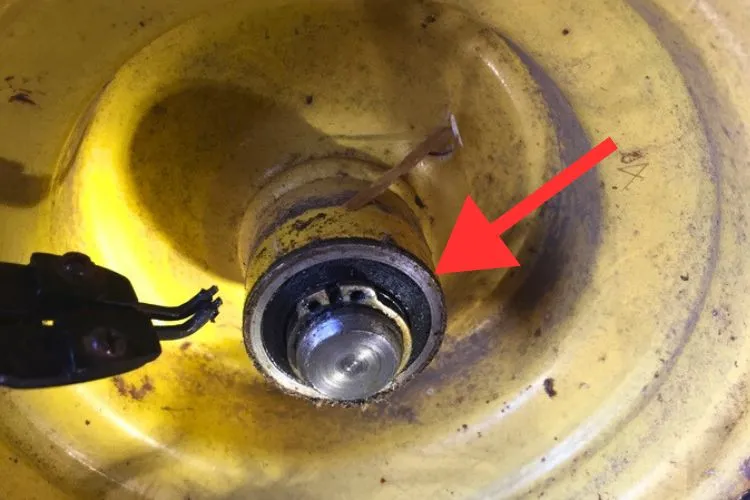
Generally, you’re looking for a small, often metallic piece that fits into a groove on the wheel’s axle shaft. It may be C-shaped, E-shaped, or even appear as a small pin inserted through a hole in the axle.
Appearance
The material and color can offer clues to its condition. A shiny, silver-colored clip is likely in good shape, whereas a rusty or discolored one might need replacing soon. Some clips might even have small tabs or ‘ears,’ which are there to help you remove them using pliers.
If your retaining clip has a loop or hole at one end, that’s usually designed for easier removal or added security.
Location
Typically, you’ll find the retaining clip on the outside end of the axle, near where the wheel fits onto it. It’s designed to sit securely in a groove or notch to prevent the wheel from sliding off the axle during operation. The clip could be integrated into the wheel hub itself in some cases, especially with more advanced or specialized mowers.
Visual Aid
(Here, images or diagrams would be invaluable for the reader to quickly identify what they’re looking for. It could be an annotated image pointing out the location and features of a typical retaining clip on a lawn mower wheel assembly.)
Removing the Retaining Clip
Successfully identifying the retaining clip is only half the battle; the real task lies in removing it without causing damage to the surrounding components. Here’s how to approach it in a detailed manner:
Accessing the Clip
First and foremost, ensure that you’ve followed all the safety precautions and preparatory steps we’ve discussed. You can access the retaining clip once the lawn mower is properly elevated and the wheel is removed.
If any other elements like washers or spacers are in the way, remove them cautiously, noting their arrangement for reassembly.
Using Pliers
Here, a pair of needle-nose pliers becomes your best ally. The pliers’ slender, elongated tip allows for precise control. Carefully grip one end of the retaining clip with your pliers.
For clips with ‘ears’ or tabs, aim to grip these for optimal leverage. Once gripped, apply a steady, measured force to pull it out (in the case of pin-style clips) or spread it open enough to slide it off the axle (for C-shaped or E-shaped clips).
A pro tip: If the retaining clip feels too tight or shows resistance, consider applying a few drops of penetrating oil to loosen any rust or grime. Let it sit for a few minutes before attempting removal again. This will make the task easier and mitigate the risk of damaging the clip or axle.
Alternative Methods
While pliers are generally the most effective tool for this job, you may find yourself in situations where alternatives are needed. A flathead screwdriver can also serve the purpose in some cases, especially for E-shaped or C-shaped clips.
Insert the screwdriver’s flat end into the gap between the clip and the axle and gently pry it open, taking care not to apply too much force, which could bend or break the clip.
Understanding the peculiarities of your specific retaining clip—whether it’s the material it’s made of, the amount of force needed for removal, or the best angle to approach it—can greatly ease the removal process.
With the right technique and care, you can safely remove the clip, making way for any maintenance or replacements needed.
Removing the Retaining Clip
Now that we’ve identified the retaining clip and prepared the mower for this task, it’s time to delve into the removal process.
Inspecting for Damage
Once the clip is removed, take a moment to inspect both the clip and the axle for any signs of wear, bending, or corrosion.
This can help you decide whether it’s prudent to replace the clip or if the old one can be reused. It’s a quick yet often overlooked step that can save you future headaches.
Marking the Position
Before removing the clip, marking its original position on the axle with a piece of masking tape or a marker might be beneficial. This ensures you’ll place it back in the correct position during reassembly, especially if multiple grooves or notches are present.
Using a Magnet
Tiny parts like retaining clips can easily be lost in the grass or cluttered workbench. Using a magnet to hold the clip once it’s removed ensures you won’t lose it and can be especially useful if you plan to reuse the clip.
Double-Check Alignment
After removal, check to ensure that no other parts were accidentally shifted or dislodged in the process. Confirm that washers, spacers, or any other components are still in their correct places or note their positions for reassembly.
Documenting the Process
If your lawn mower model is a bit more complex or you’re new to this kind of task, taking photos at each stage of the removal process can serve as a useful guide for both reassembly and for any future occasions where you’ll need to remove the clip again.
Pro Tips for Smooth Removal
After 30 years of working with lawn mowers and their components, I’ve gathered some tricks of the trade that can make the removal of a retaining clip not just easier but also more efficient.
Here are some expert tips to keep in mind:
Lubricating the Clip
Sometimes, retaining clips can become stubborn due to rust or caked-on grime. To alleviate this, spray a small amount of lubricant like WD-40 on the clip and let it sit for a few minutes.
This will ease friction and make the clip easier to slide off or pull out. Just wipe away any excess lubricant to avoid attracting dirt later.
Gentle Pressure is Key
While you might feel inclined to use brute force, especially if the clip seems stuck, resist the urge. Applying too much pressure can bend or deform the clip, making it unsuitable for reuse and risking damage to the axle.
Remember, it’s not a test of strength but a task requiring finesse. Use consistent, gentle pressure when using your tools to remove the clip.
Have a Container Ready
Small components like retaining clips, washers, or spacers are notoriously easy to lose. Before you start the process, have a small container or magnetic tray nearby to place these small parts as you remove them.
This keeps them in one place and makes it easier when it comes time for reassembly.
By incorporating these pro tips into your retaining clip removal process, you make the task smoother and mitigate the risk of minor yet costly mistakes.
Whether you’re a seasoned professional or a weekend warrior regarding lawn mower maintenance, these tips are invaluable for any clip-removal task.
Wheel Maintenance and Inspection
With the retaining clip successfully removed and the wheel assembly off the lawn mower, you’re presented with a perfect opportunity to perform routine maintenance and inspection.
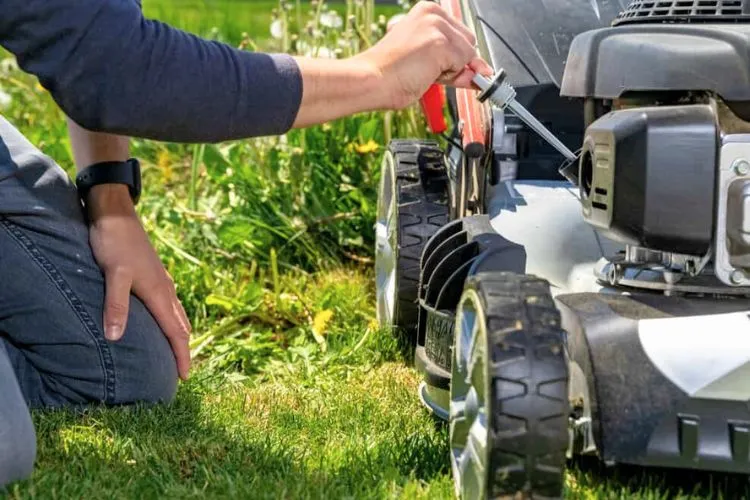
Overlooking this step is like missing half the story; the removal process isn’t just about the clip but also about enhancing your mower’s overall longevity and performance. Here’s what you should look out for:
Signs of Wear and Tear
Examine the wheel and the axle for signs of wear, such as grooves, flat spots, or fraying. If you notice significant wear, consider replacing the part. Ignoring these signs can lead to a reduction in mower performance and could even cause further damage over time.
Check for Damage
Physical damage like cracks or bends in the wheel or axle is often visible upon close inspection. Any such defects warrant immediate replacement, as they can cause instability or become hazardous when operating the mower.
Debris and Dirt
Dirt, grass, and other debris often accumulate around the wheel assembly and impede smooth operation. Use this opportunity to clean these parts thoroughly.
A wire brush and some soapy water are usually sufficient for this task. Make sure to dry all parts completely to prevent rust.
This maintenance step doesn’t take much time but can save you from future headaches, improve your mower’s efficiency, and extend its lifespan. A proactive approach to wheel maintenance can make a difference in how your lawn mower performs.
How to Reassemble and Do The Testing?
You’ve successfully removed the wheel and retaining clip, and hopefully, you’ve taken the opportunity to perform some routine maintenance. Now it’s time to reassemble everything and test to ensure everything works perfectly.

Putting the Retaining Clip Back
- Align the Holes: Before putting the retaining clip back, ensure the hole in the wheel assembly aligns perfectly with the hole on the axle. An alignment issue here could lead to improper fitting and later complications.
- Use Needle-Nose Pliers: Grip one end of the retaining clip with needle-nose pliers. Ensure you grip firmly, as the clip can easily slip and fly off.
- Insert and Release: Carefully slide the clip into the hole, ensuring it aligns with the grooves on the axle. Slowly release the pliers’ pressure, allowing the clip to snap into place securely.
Mounting the Wheel
- Preparation: Make sure the axle is free from any obstructions and is well-lubricated. Any debris can interfere with the wheel mounting.
- Position the Wheel: Slide the wheel onto the axle, ensuring it aligns properly with its grooves.
- Secure the Wheel: Once the wheel is on the axle, double-check to ensure it’s seated correctly against any washers or spacers.
- Final Clip Insertion: Reattach the retaining clip as instructed above to secure the wheel onto the axle.
Testing the Wheel
- Hand Spin: Before lowering the mower, give the wheel a gentle spin by hand. It should move freely, without any wobbles or catches.
- Check Alignment: Look at the wheel from different angles to ensure it’s perfectly aligned. Any tilt or skew could lead to uneven wear and tear or compromise stability.
- Lower the Mower: Place the mower back on the ground carefully.
- Functional Test: Briefly turn the lawn mower on and observe the wheel’s rotation. It should move smoothly, with no signs of wobbling or sticking. If you observe any issue, it’s crucial to disassemble and identify the problem before using the mower.
Each of these steps is crucial for ensuring a safe and effective reassembly. Make sure you follow them to the letter; otherwise, you risk affecting not only the performance of your wheel but also the overall safety and efficiency of your mower.
Frequently Asked Questions (fAQs)
Can I remove the retaining clip without any tools?
Removing the clip without proper tools like pliers is not advisable, as you risk damaging the clip or injuring yourself.
What if the retaining clip is stuck? How can I free it?
Use penetrating oil to loosen a stuck clip. Wait a few minutes, then gently apply pressure with pliers to remove it.
Is it necessary to remove the wheel to access the retaining clip?
In most cases, yes. Removing the wheel gives better access and leverage to safely remove the retaining clip.
Can I reuse the old retaining clip, or should I replace it?
Reuse is possible if the clip shows no signs of wear or damage. However, replacing it is the safer option.
How often should I replace the retaining clip?
Replace the clip during routine maintenance or if you notice signs of wear, corrosion, or damage.
What if I lose the retaining clip?
If lost, replace the clip immediately. Operating the mower without it could lead to wheel detachment and damage.
Conclusion :
Removing a lawn mower wheel retaining clip is invaluable for effective maintenance and timely repairs.
The steps we’ve outlined—from gathering the necessary tools and implementing safety measures to the final reassembly and testing—are designed to make this task manageable and safe for anyone.
We hope that this guide has been helpful. You can read about similar topics here on our website. Check back again soon for more..

